CenterPoint Fund Accounting
- Buttons and Fields Overlapping or Not Available
| Document #: | 3163 | Product: | CenterPoint® |
|---|
You may run into a situation where not all of your buttons and fields are available in transaction screens. This is caused by a display setting within the operating system itself. Follow the instructions below to change display settings back to the default.
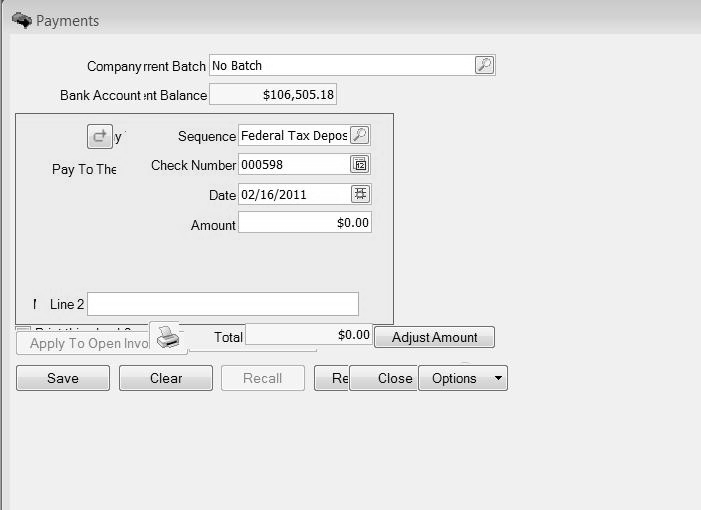
Example of Buttons Overlapping:
This is an example of how overlapping buttons and fields will display in CenterPoint:
Make Changes to the Operating System to Correct the Issue
Windows 10 Operating System
- Exit out of CenterPoint and all other programs on your computer.
- At the main desktop, right-click in any space not populated by an icon.
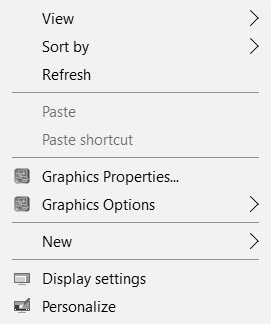
- Select Display settings.
- Change the slider below Change the size of text, apps, and other items to 100% (Recommended).
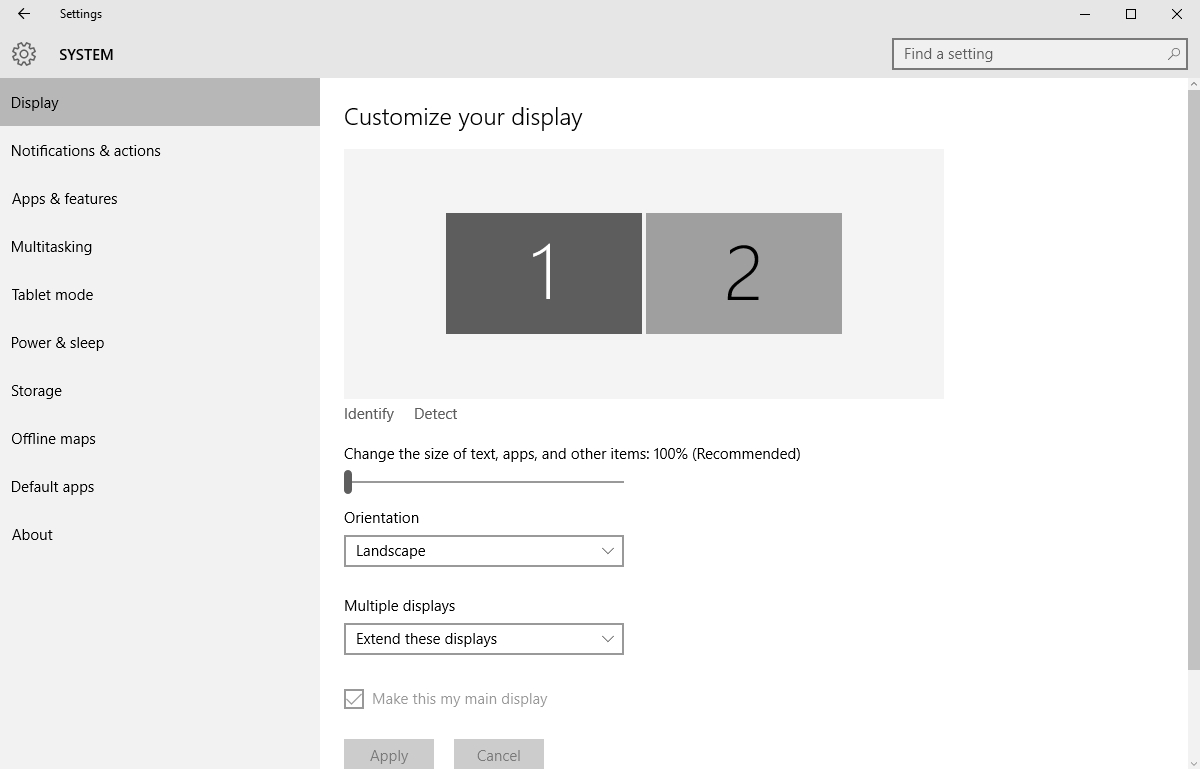
- Click Apply and the red X to close. You may be prompted to reboot your computer. Once the computer has been restarted, the screens within CenterPoint will begin displaying properly again.
Windows 8 Operating System
- Exit out of CenterPoint and all other programs on your computer.
- At the main desktop, right-click in any space not populated by an icon.
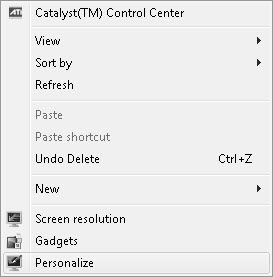
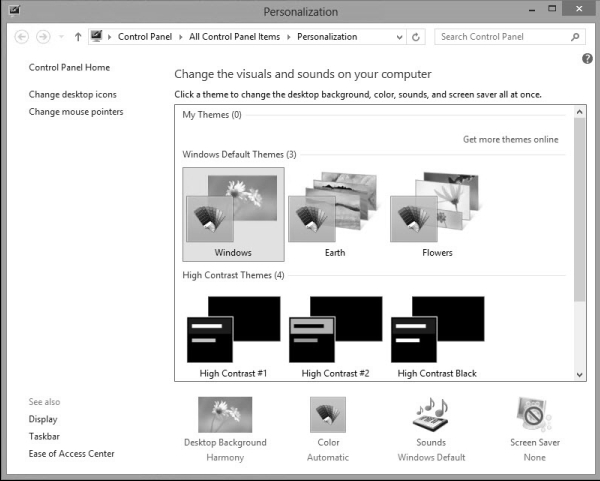
- Select Personalize.
- At the Personalization screen, select Display (in the lower left corner).
- Within the Display screen, select Smaller - 100% (default).
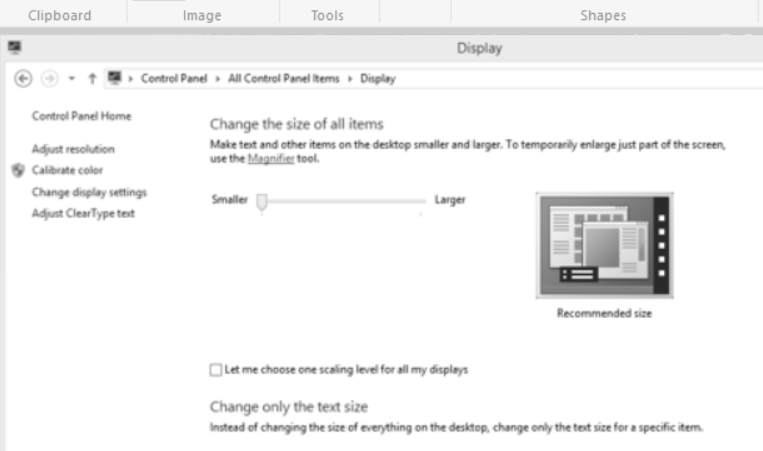
- Click Apply and the red X to close. You will be prompted to reboot your computer. Once the computer has been restarted, the screens within CenterPoint will begin displaying properly again.
Windows 7 Operating System
- Exit out of CenterPoint and all other programs on your computer.
- At the main desktop, right-click in any space not populated by an icon.
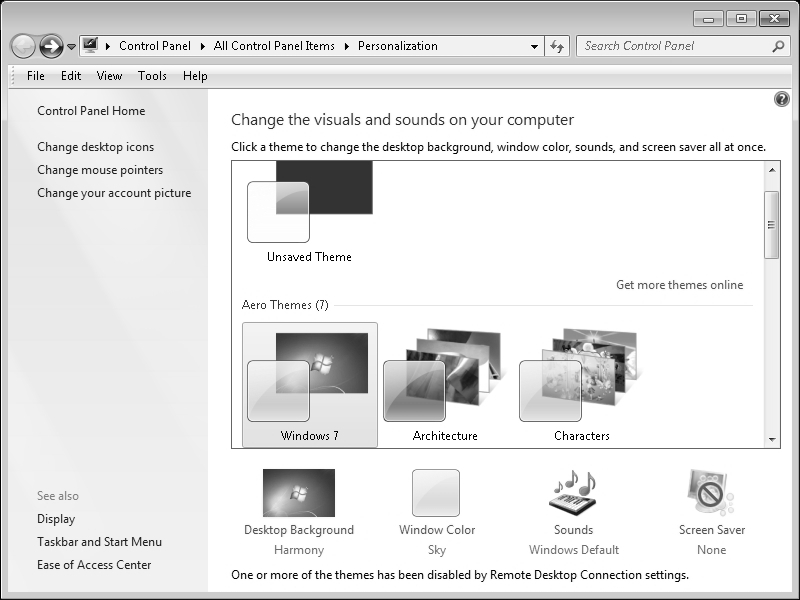
- Select Personalize.
- At the Personalization screen, select Display (in the lower left corner).
- Within the Display screen, select Smaller - 100% (default).
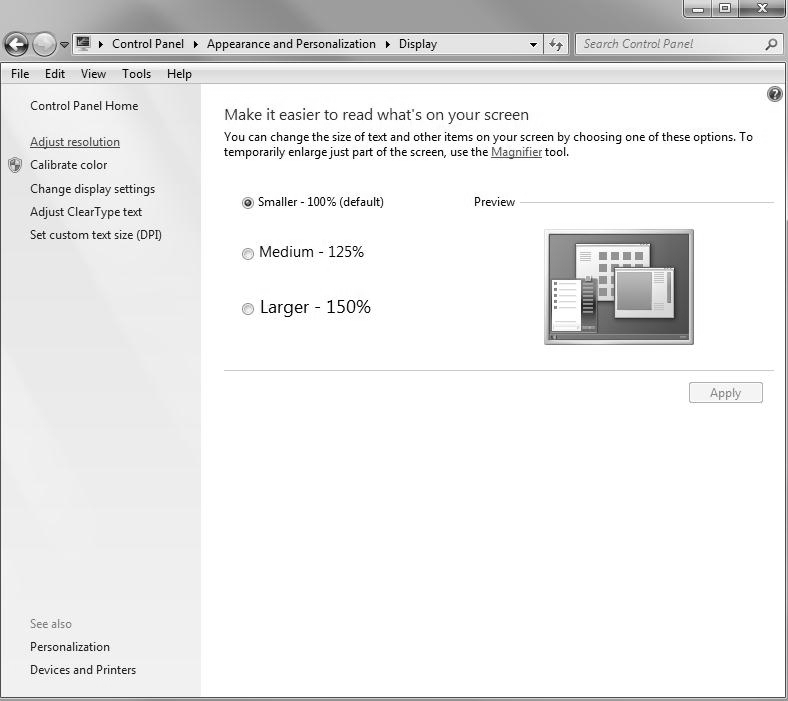
- Click Apply and the red X to close. You will be prompted to reboot your computer. Once the computer has been restarted, the screens within CenterPoint will begin displaying properly again.
Windows Vista Operating System
- Exit out of CenterPoint and all other programs on your computer.
- At the main desktop, right-click in any space not populated by an icon.
- Select Personalize.
- At the Personalization screen, select Adjust Font Size (DPI) (in the upper left corner).
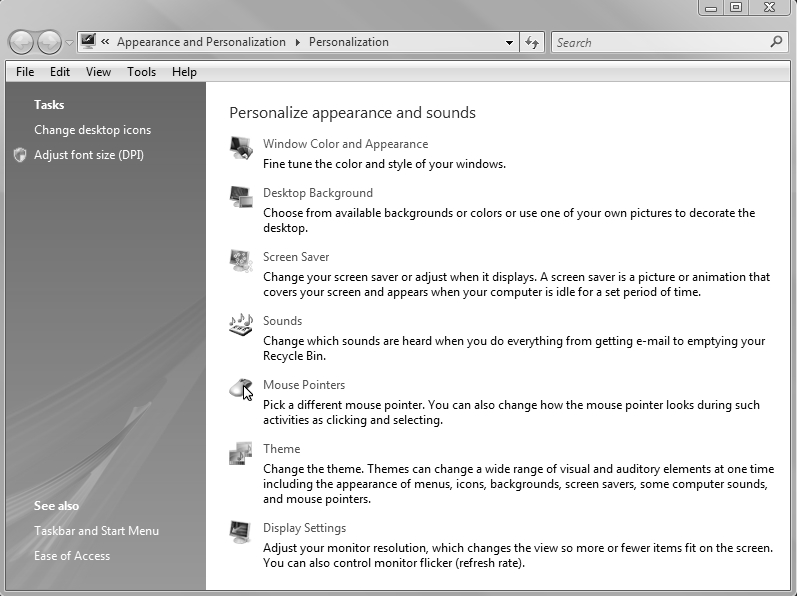
- Within the DPI Scaling screen, select Default scale (96 DPI) - fit more information.
- Click OK.
Windows XP Operating System
- Exit out of CenterPoint and all other programs on your computer.
- At the main desktop, right-click in any space not populated by an icon.
- Select Properties.
- Click the Settings tab.
- Click the Advanced button.
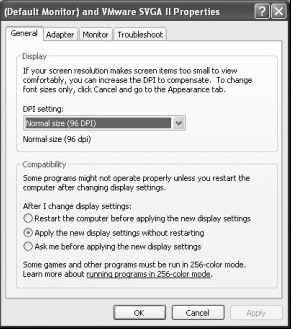
- In the DPI Setting box, select Normal size(96 DPI).
- Click OK.